How to Clean AirPods and Restore Clear Sound
Muffled audio from your AirPods is almost never a hardware failure — it is earwax, skin oil, and dust packed into the speaker mesh. A 10-minute cleaning session restores full clarity in the majority of cases without any tools beyond what you already have at home. This guide covers the complete cleaning protocol for AirPods, AirPods Pro, and AirPods Max, plus an acoustic maintenance method that removes debris physical cleaning cannot reach.
What You Need-How to Clean AirPods
Everything required is either already in your home or costs under a dollar:
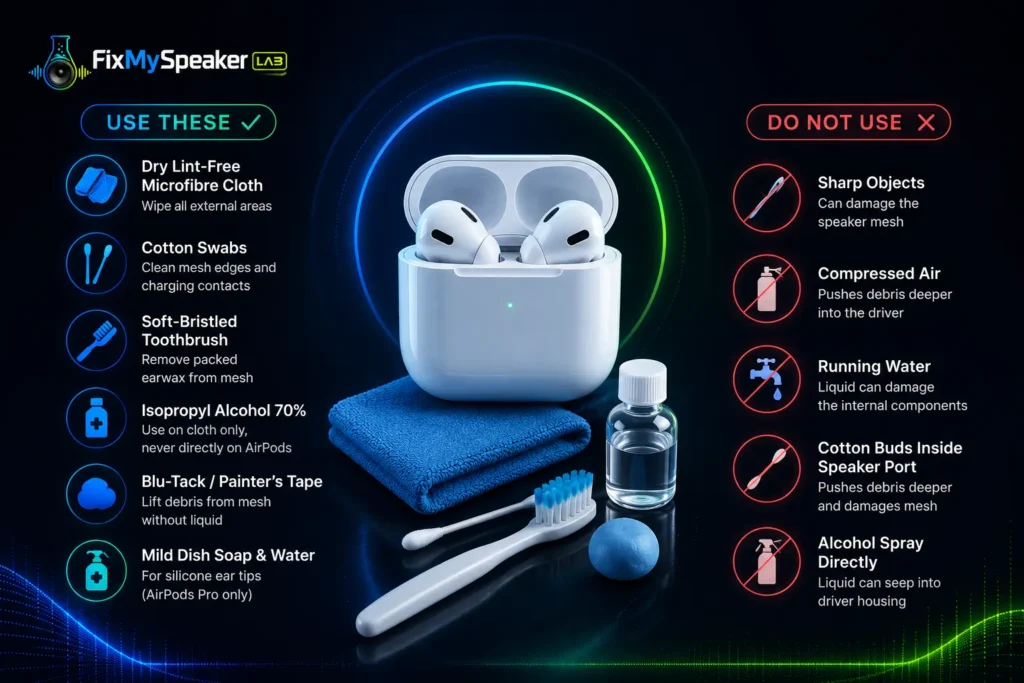
Dry lint-free microfibre cloth — the primary cleaning surface for all external areas. Cotton swabs — for speaker mesh edges and charging contact points. Soft-bristled toothbrush — the most effective tool for dislodging packed earwax from mesh grilles. Isopropyl alcohol 70% — applied to the cloth only, never directly to AirPods. Blu-Tack or painter’s tape — lifts debris from mesh without liquid. Mild dish soap and water — for silicone ear tips on AirPods Pro only, never for the earbuds themselves.
What not to use: Sharp objects, compressed air directed into the mesh, running water, cotton buds inserted directly into the speaker port, or alcohol sprayed directly onto any surface. Each of these either damages the speaker mesh, pushes debris deeper into the driver, or allows liquid into the driver housing.
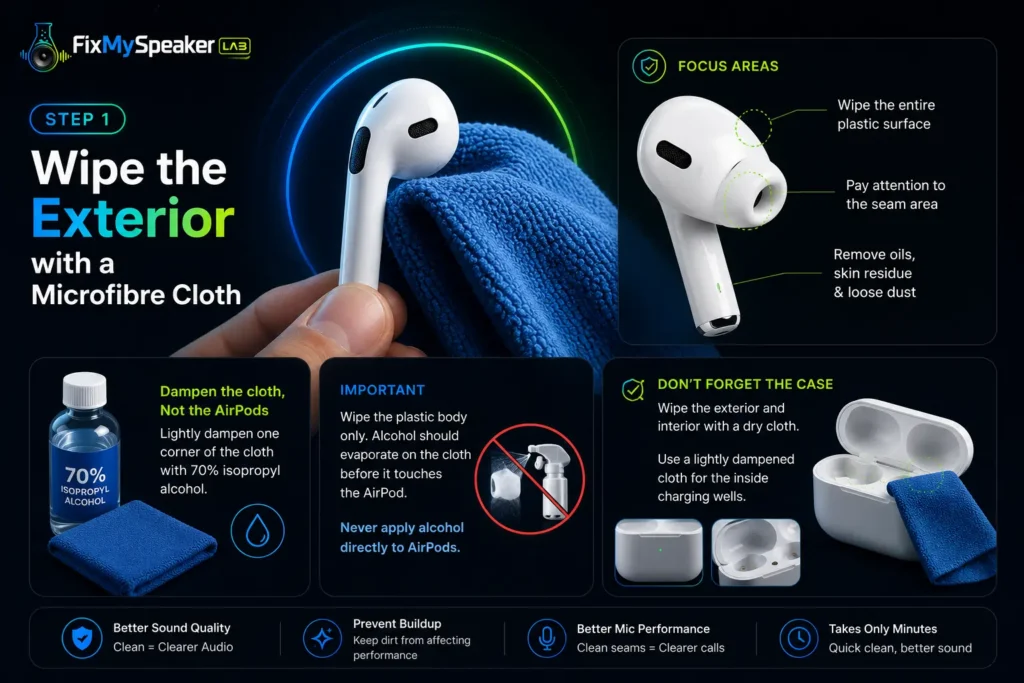
Step 1 — Wipe the Exterior with a Microfibre Cloth
surface of each AirPod, removing surface oils, skin residue, and loose dust. Pay specific attention to the seam where the stem meets the earbud body — this junction collects debris that affects both audio quality and microphone performance.
For stubborn surface marks, lightly dampen — not wet — one corner of the microfibre cloth with 70% isopropyl alcohol.
Wipe the plastic body only. The alcohol should evaporate within seconds on contact with the cloth before it reaches the AirPod surface. Never apply alcohol directly to the AirPod.
The charging case deserves the same treatment. Wipe interior and exterior with a dry cloth, then use a lightly dampened cloth for the inside charging wells where skin oil accumulates and can interfere with charging contacts.
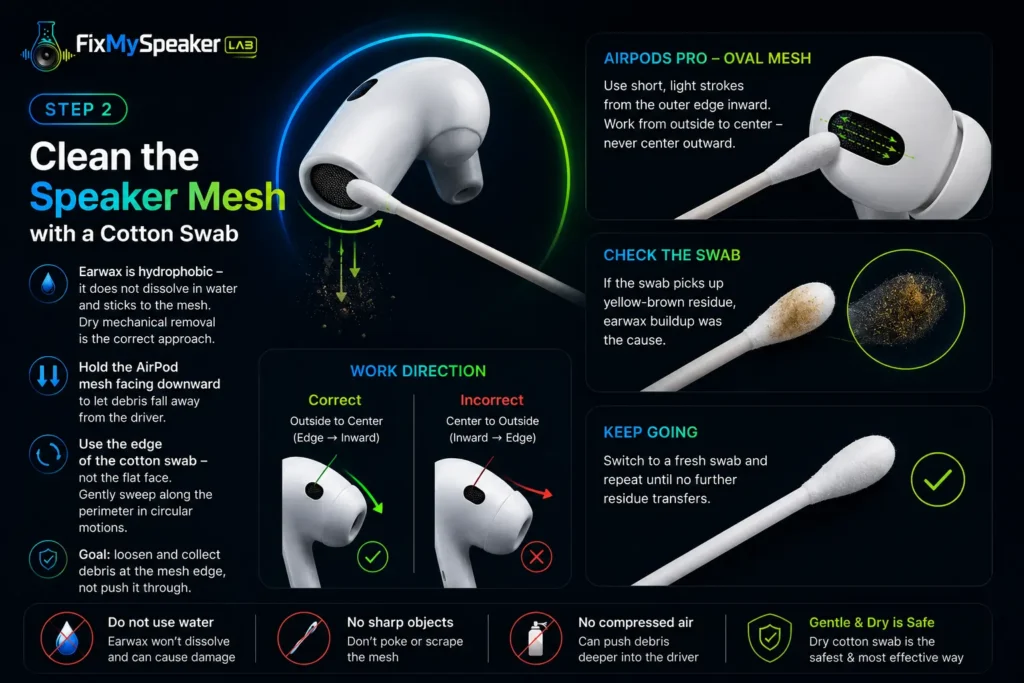
Step 2 — Clean the Speaker Mesh with a Cotton Swab
The speaker mesh is the primary source of audio degradation in AirPods. Earwax is hydrophobic — it does not dissolve in water and adheres strongly to the metal mesh surface. Dry mechanical removal is the correct approach.
Hold the AirPod with the speaker mesh facing downward. This orientation uses gravity to help dislodged debris fall away from the driver rather than deeper into it. Take a dry cotton swab and use the edge — not the flat face — to gently sweep along the perimeter of the mesh in circular motions. The goal is to loosen and collect debris at the mesh edge, not to press it through.
For AirPods Pro, the oval mesh opening responds better to the swab tip moving across the mesh surface in short, light strokes from the outer edge inward. Work from outside to center — never center outward, which pushes debris into the driver.
If the swab picks up yellow-brown residue, this confirms earwax accumulation was the source of audio degradation. Continue with a fresh swab until no further residue transfers.
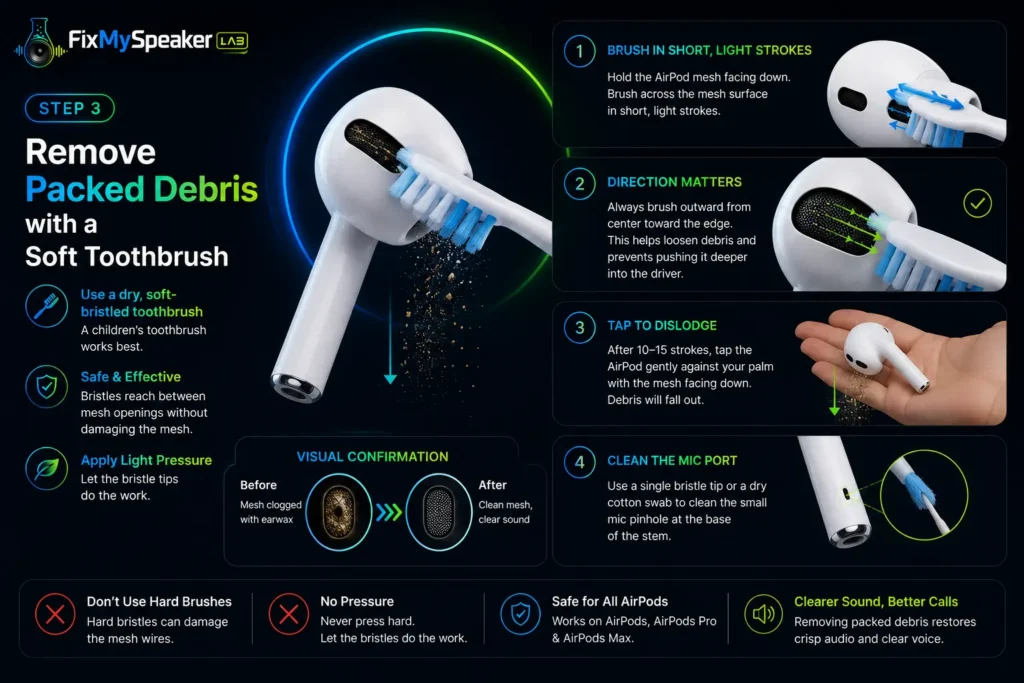
Step 3 — Remove Packed Debris with a Soft Toothbrush
A dry, soft-bristled toothbrush — a children’s toothbrush works best due to its smaller head and softer bristles — is the most effective tool for removing compacted earwax from AirPod speaker mesh. The bristles reach between mesh openings without applying the concentrated pressure that can damage individual mesh wires.
Hold the AirPod speaker mesh facing down and use short, light brushing strokes across the mesh surface. The direction should always be outward from center — brushing toward the mesh edge so that loosened material falls away from the driver. Apply almost no pressure — let the bristle tips do the work.
After 10 to 15 strokes, tap the AirPod gently against your palm — mesh facing down — to dislodge any debris the brushing loosened. A visible amount of fine gray or yellowish powder falling from the mesh confirms the method is working.
For the microphone port — the small pinhole at the base of the stem — use a single bristle tip or a dry cotton swab tip with the same downward-facing, outward-sweeping technique. A blocked microphone port is the primary cause of callers reporting muffled voice on AirPods calls.
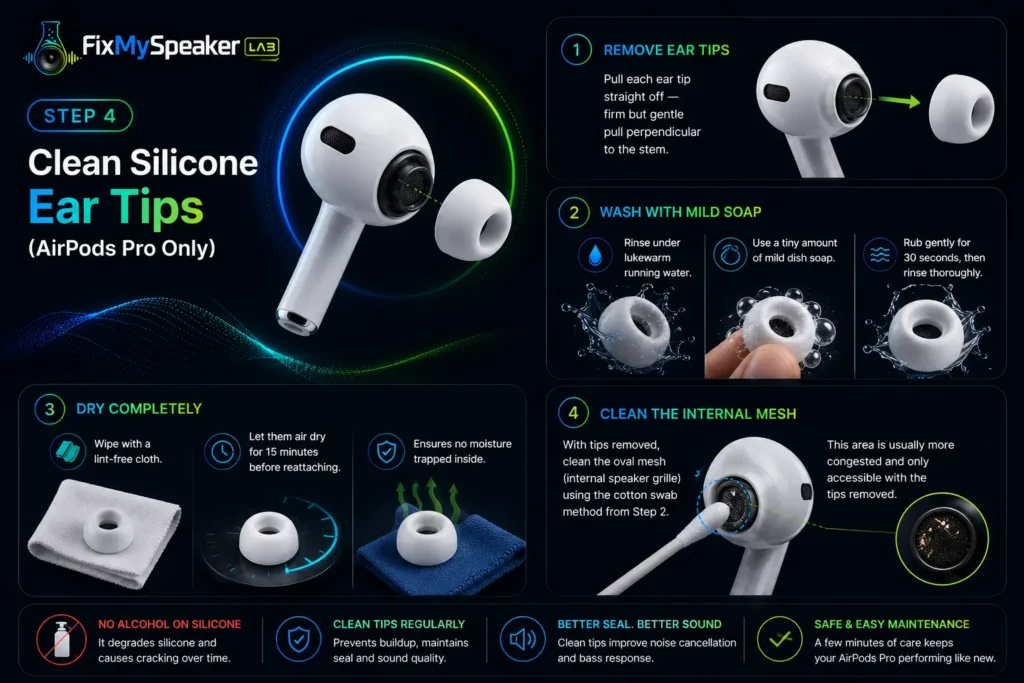
Step 4 — Clean Silicone Ear Tips (AirPods Pro Only)
AirPods Pro ear tips are removable and should be cleaned separately from the earbuds themselves. Pull each ear tip straight off — they detach with a firm but gentle pull perpendicular to the earbud stem.
Rinse the silicone tips under lukewarm running water. For significant buildup, apply a tiny amount of mild dish soap and work it into the silicone surface with your fingers for 30 seconds, then rinse thoroughly. No alcohol on silicone — it degrades the material over time and accelerates cracking.
Dry the ear tips completely with a lint-free cloth before reattaching. Moisture trapped between the ear tip and the earbud housing during reattachment can work its way into the driver over time. Leave them on a dry surface for 15 minutes after wiping before snapping them back on.
The oval mesh beneath where the ear tip attaches — the internal speaker grille — should be cleaned with the cotton swab method from Step 2 while the tips are removed. This area is usually more congested than the mesh visible when tips are on, and removing the tips is the only way to access it properly.
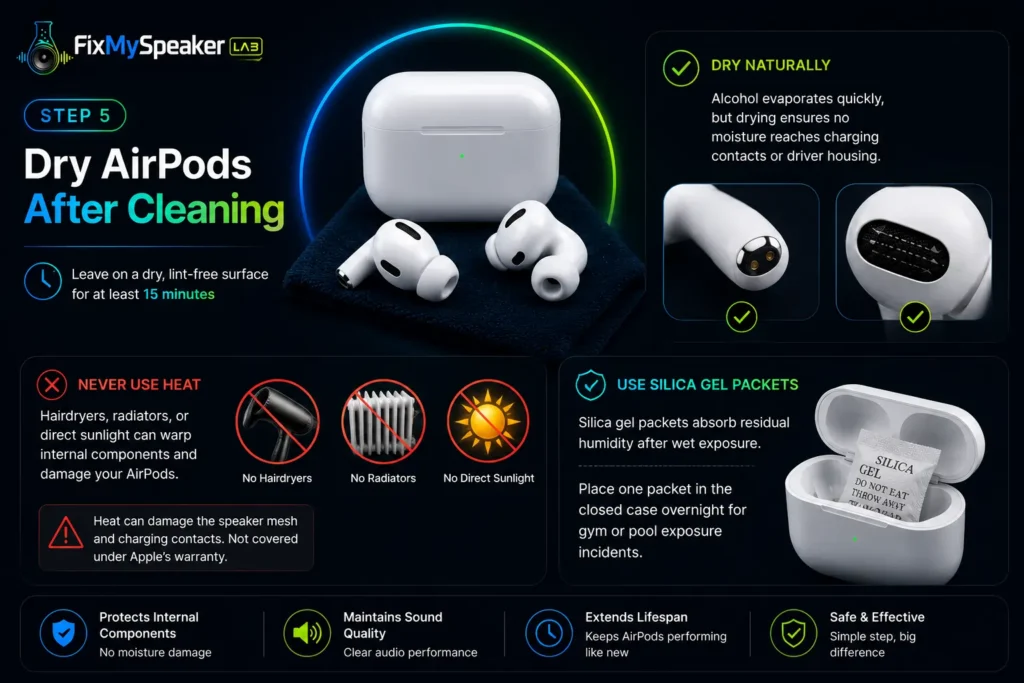
Step 5 — Dry AirPods After Cleaning
After any cleaning that involved a lightly damp cloth, leave AirPods on a dry, lint-free surface for at least 15 minutes before returning them to the case or using them. This applies even though the alcohol evaporates quickly — the drying period ensures no residual moisture from the cloth reaches the charging contacts or driver housing.
Never use heat to accelerate drying. Hairdryers, placing AirPods on a radiator, or leaving them in direct sunlight all risk warping the internal acoustic components. The earbud body is sealed against casual moisture but the speaker mesh and charging contacts are open — heat applied to these areas causes damage that is not covered under Apple’s warranty.
Silica gel packets in the charging case — not rice — can absorb residual humidity after any wet-area exposure. Leave one packet in the closed case overnight for gym or pool exposure incidents.
Acoustic Cleaning — The Step Physical Methods Cannot Reach
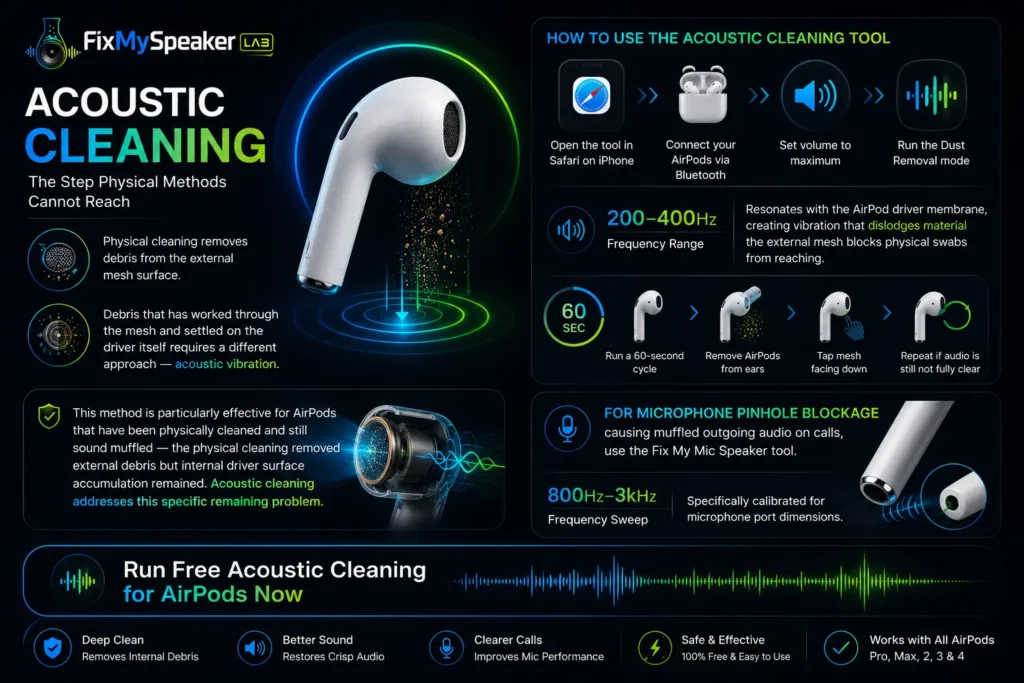
Physical cleaning removes debris from the external mesh surface. Debris that has worked through the mesh and settled on the driver itself requires a different approach — acoustic vibration.
The free acoustic cleaning tool at FixMySpeakerLab uses calibrated sound frequencies delivered through the AirPod speaker driver to vibrate debris loose from the internal driver surface. Open the tool in Safari on iPhone, connect your AirPods via Bluetooth, set volume to maximum, and run the Dust Removal mode.
The 200–400Hz frequency range resonates with the AirPod driver membrane, creating vibration that dislodges material the external mesh blocks physical swabs from reaching. Run a 60-second cycle, remove AirPods from ears, tap mesh facing down, and repeat if audio is still not fully clear.
This method is particularly effective for AirPods that have been physically cleaned and still sound muffled — the physical cleaning removed external debris but internal driver surface accumulation remained. Acoustic cleaning addresses this specific remaining problem.
For microphone pinhole blockage causing muffled outgoing audio on calls, use the Fix My Mic Speaker tool — an 800Hz–3kHz sweep specifically calibrated for microphone port dimensions.
Run Free Acoustic Cleaning for AirPods Now
How Often to Clean AirPods
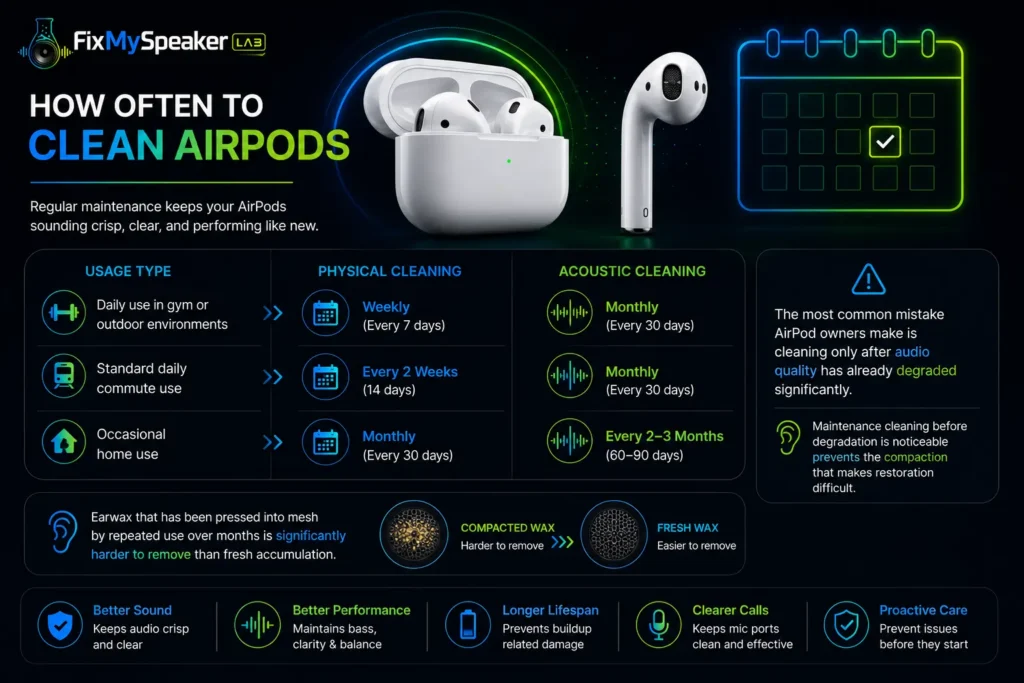
Daily use in gym or outdoor environments — weekly physical cleaning, monthly acoustic maintenance cycle.
Standard daily commute use — physical cleaning every two weeks, acoustic cycle monthly.
Occasional home use — physical cleaning monthly, acoustic cycle every 2–3 months.
The most common mistake AirPod owners make is cleaning only after audio quality has already degraded significantly. Maintenance cleaning before degradation is noticeable prevents the compaction that makes restoration difficult. Earwax that has been pressed into mesh by repeated use over months is significantly harder to remove than fresh accumulation.
AirPods Pro vs AirPods vs AirPods Max — Cleaning Differences
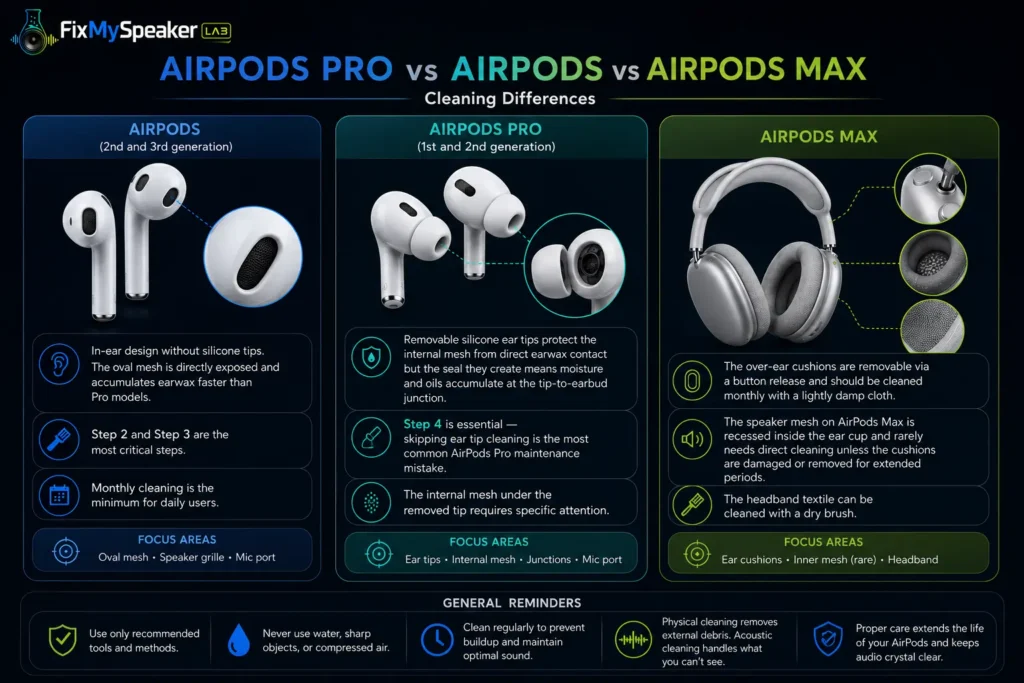
AirPods (2nd and 3rd generation):
In-ear design without silicone tips. The oval mesh is directly exposed and accumulates earwax faster than Pro models. Step 2 and Step 3 are the most critical steps. Monthly cleaning is the minimum for daily users.
AirPods Pro (1st and 2nd generation):
Removable silicone ear tips protect the internal mesh from direct earwax contact but the seal they create means moisture and oils accumulate at the tip-to-earbud junction. Step 4 is essential — skipping ear tip cleaning is the most common AirPods Pro maintenance mistake. The internal mesh under the removed tip requires specific attention.
AirPods Max:
The over-ear cushions are removable via a button release and should be cleaned monthly with a lightly damp cloth. The speaker mesh on AirPods Max is recessed inside the ear cup and rarely needs direct cleaning unless the cushions are damaged or removed for extended periods. The headband textile can be cleaned with a dry brush.
When Cleaning Does Not Restore Sound Quality
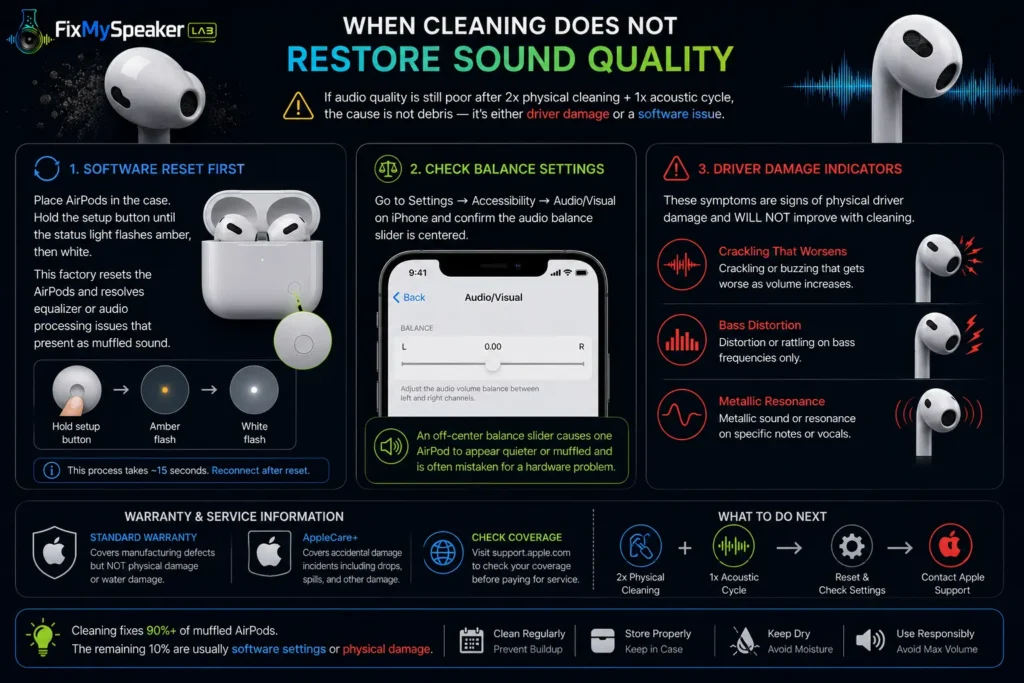
If audio quality remains significantly degraded after two complete physical cleaning sessions plus an acoustic cycle, the cause is not accumulated debris — it is either driver damage or a software issue.
Software reset first:
Place AirPods in the case, hold the setup button until the status light flashes amber, then white. This factory resets the AirPods and resolves equalizer or audio processing issues that present as muffled sound.
Check balance settings:
Go to Settings → Accessibility → Audio/Visual on iPhone and confirm the audio balance slider is centered. An off-center balance slider causes one AirPod to appear quieter or muffled and is often mistaken for a hardware problem.
Driver damage indicators:
Crackling that specifically worsens as volume increases, distortion on bass frequencies only, or a metallic resonance on specific notes are signs of physical driver damage. These symptoms do not improve with cleaning and require Apple service.
AirPods are covered under Apple’s standard warranty for manufacturing defects but not for physical damage including water damage. AppleCare+ covers accidental damage incidents — check coverage at support.apple.com before paying for out-of-warranty service.
Conclusion — Clean Regularly, Sound Better
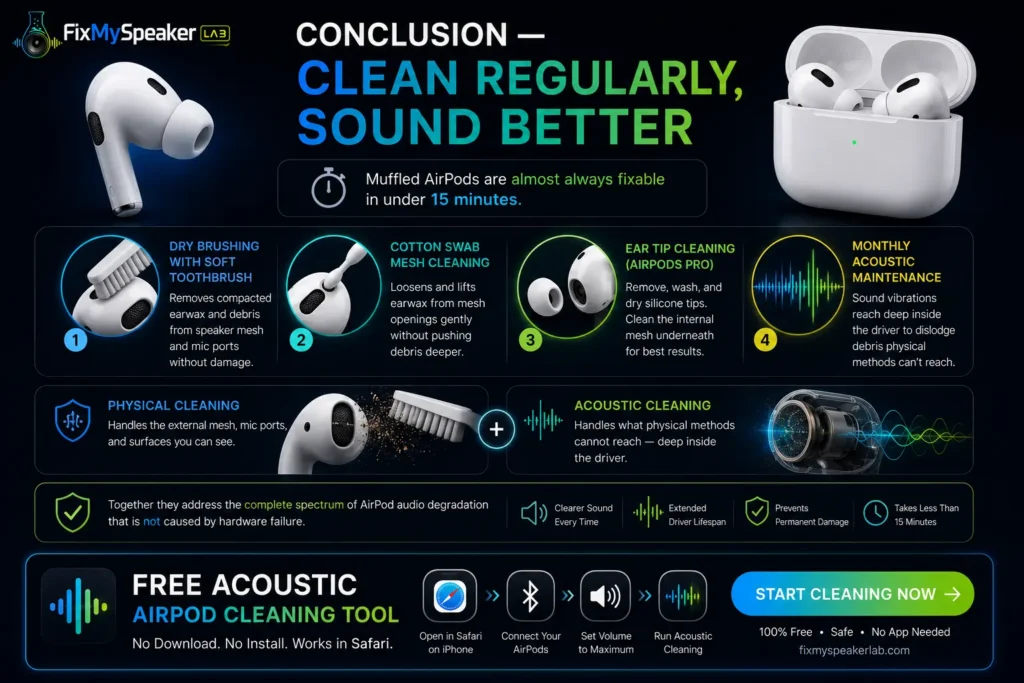
Muffled AirPods are almost always fixable in under 15 minutes. The combination of dry brushing with a soft toothbrush, cotton swab mesh cleaning, separate ear tip cleaning for AirPods Pro, and a monthly acoustic maintenance cycle maintains consistent audio quality and extends driver lifespan by preventing the compacted buildup that causes permanent mesh distortion.
Physical cleaning handles the external mesh. Acoustic cleaning handles what physical methods cannot reach. Together they address the complete spectrum of AirPod audio degradation that is not caused by hardware failure.
Apple’s official AirPods cleaning guide
For more related tools visit out tool section, Tool Hub at Quicks tools section & for speaker related issues visit our home page Fix My speaker.
Free Acoustic AirPod Cleaning Tool — No Download, Works in Safari